Download HostTelFSP version 3.0.1
(now with x64 and Windows 7 support)
Usage Instructions
Host Tel™ FSP integrates with the standard Windows® Fax Service, to allow you
to send faxes directly from your PC.
Installation of Host Tel™ FSP is in two stages.
Step 1:
The first step is to ensure you have the standard Windows® Fax Service installed.
You can check this via the control panel.
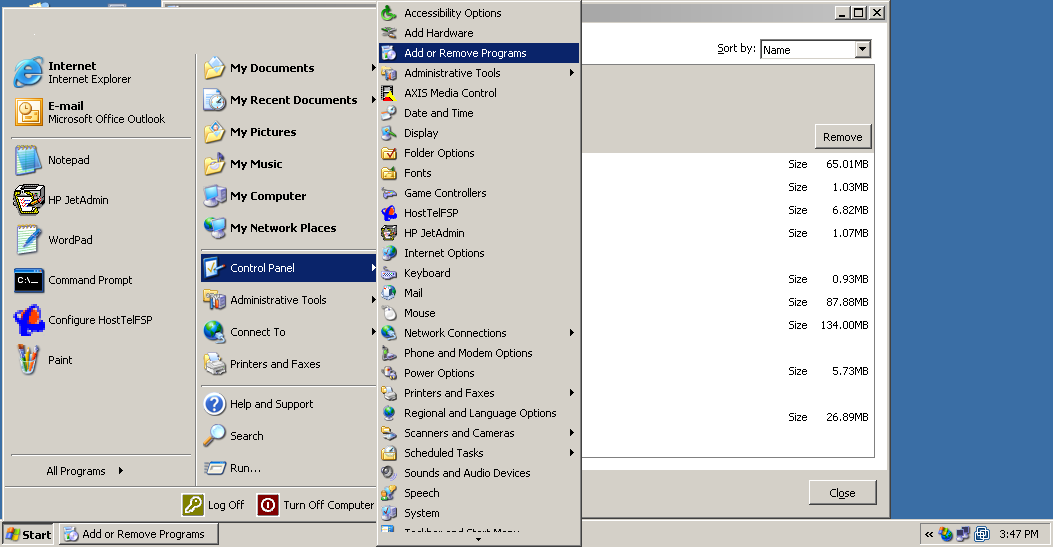
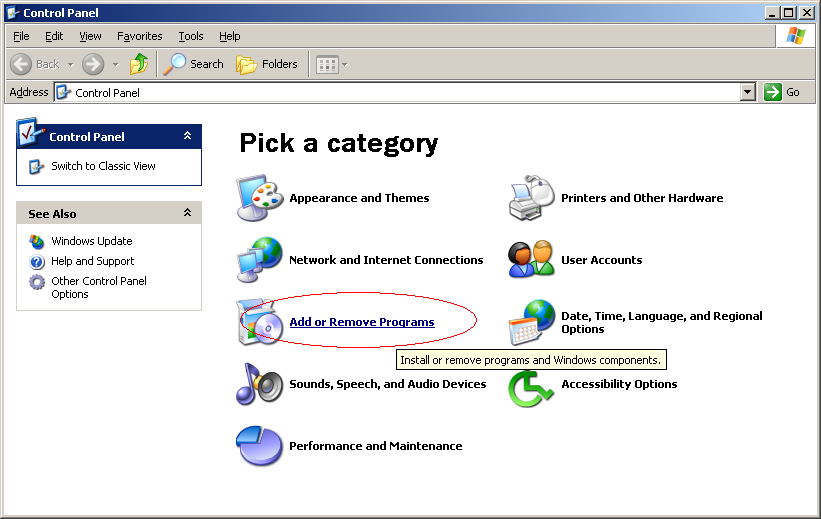
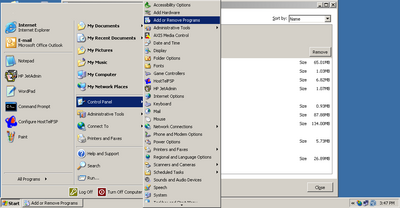
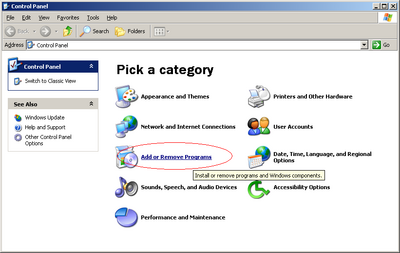
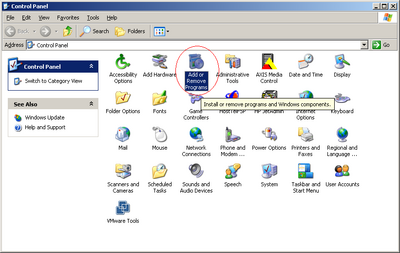
There are a few different ways to open the Control Panel, depending on how your
PC is configured, but the most common method is by clicking the Start menu,
then Control Panel. Then please open "Add or Remove programs"
Below are some screenshots of different ways to open the Add/Remove programs
Control Panel applet, click the image to get a larger view:
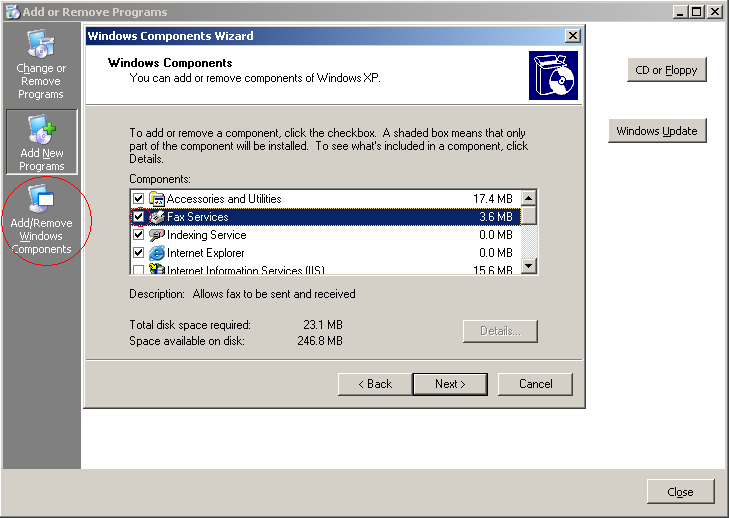
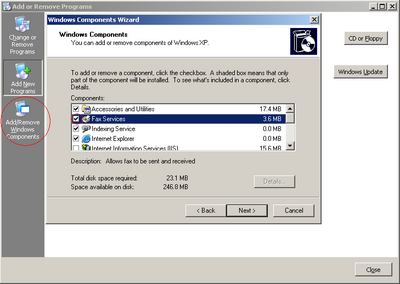
Once you have opened the "Add or Remove programs" applet, please click on
"Add / Remove Windows Components", then verify there is a tick √ in the box
next to "Fax Services".
If that option is ticked the first step is complete, and you can click the "Cancel" button and close the control panel, then continue on to
Step 2 below.
Otherwise, please tick the box next to "Fax Services", then choose "Next" and
follow the prompts.
You will need your original Windows® installation CD
to continue, since we are installing original Microsoft® Windows® software.
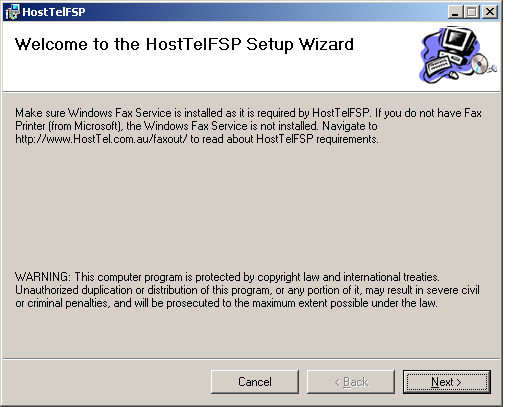
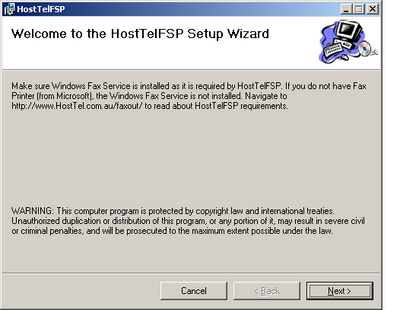
Step 2:
If you haven't already, please Download the
HostTelFSP driver
and then double-click on it to begin the installation
You will see a screen similar to the below:
Please follow the prompts to install the software. Once it is installed
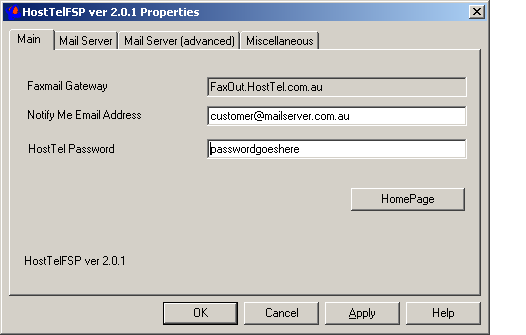
you will see a screen similar to this one:

Please fill in your email address, and the password allocated to you
by Host Tel™ for outbound faxing.
Congratulations - you can now send faxes!
Usage:
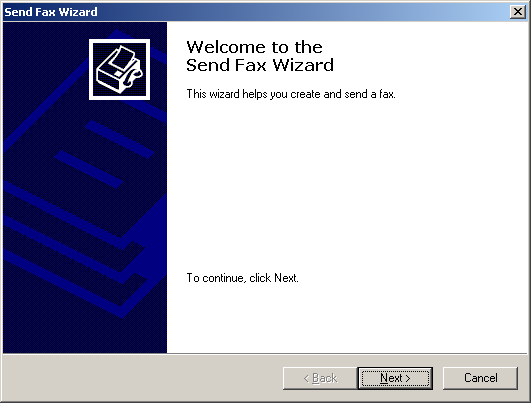
To send a fax using Host Tel™ FSP, you Print from any application you have open
and choose the "FAX" Printer.
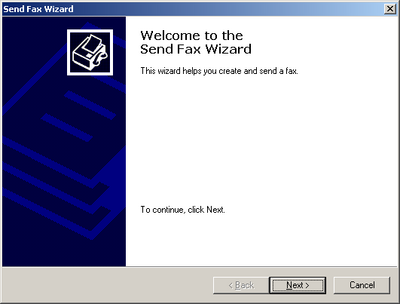
You will see a wizard similar to this one:
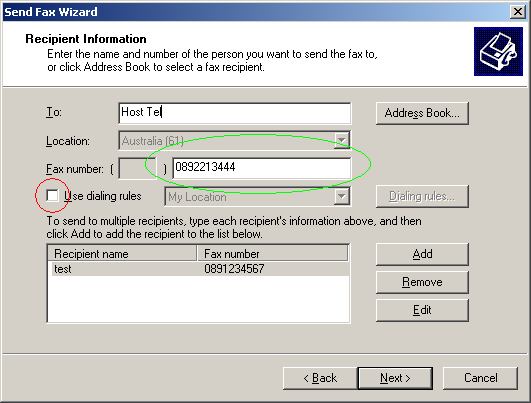
Click "Next" to see this screen:
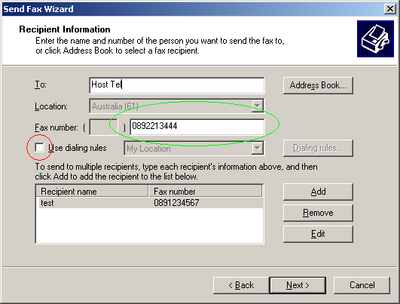
Please ensure the "Use dialing rules" option is NOT selected,
and put the destination fax number (including area code) in the large
white box next to "Fax Number:" (circled in green)
In the "To:" location you can put the recipient's name.
Then click "Next" on the next few pages, followed by "Finish"
on the last page, and your fax is on its way.
You will receive an email confirmation on success or failure.
Vista notes:
We don't have access to Vista here at Host Tel, so we cannot be very specific,
but we have some notes from the author of our software for Vista support:
Unfortunately, the Vista Home edition is not supported because
Windows Fax Service in not included in this edition.
It is necessary to configure the following items in the process of installing
the HostTelFSP and sending the first fax using HostTelFSP,
a. Navigate to Control Panel, Phone and Modem settings and fill in
Location settings.
b. Navigate to Start, Programs, Windows Fax and Scan (it used to be called
Fax Console in XP), navigate to Tools, fill in Fax Accounts (Local Modem
account on Local Fax is required to use HostTelFSP, of course there is no need
for a physical fax-modem). Close Windows Fax and Scan.
Due to enhanced security in Vista/2008, make sure the Windows Fax Service is not blocked by the Windows firewall.
Server 2003 and 2008 notes:
Each user can specify their own email address in the Fax Console:
Open up "Printers and Faxes" and double click on the "Fax" printer.
Then from the "Tools" menu select "Sender Information"
The email address you specify here is where your fax success or failure
notifications will be sent.
Microsoft® and Windows® are registered trademarks of Microsoft Corporation.